
SITE SELECTION
The size of the garden should be determined by available space, your needs, and the amount of time and effort you’re willing to put into it. Proper site placement is important. Most vegetables and herbs require full sun, a minimum of 6 hours. Avoid areas that are close to trees because of shading and root issues. The garden bed should have good drainage and no pooling problems after heavy rains; raised beds are a solution for problem soils. Excessively windy areas should have wind break such as a fence or landscape plantings. Garden beds also should be in easy access of water supply.
Don’t despair if you lack the area for a garden! Container gardens can be quite successful by using the right techniques (See Container Gardening).
GARDEN LAYOUT
Review your site and do some planning! Decide what vegetables and herbs your household will use and enjoy, then draw a layout sketch of the garden. Refer to your selected plants’ space requirements when figuring quantities and placement; the labels on Chef Jeff Vegetables and Herbs have spacing recommendations (See Plants). Overcrowding your plants reduces production and encourages insect problems; proper spacing provides good air circulation helping to control diseases. A good garden layout should allow enough room for easy cultivation. Save your garden drawings, photos and notes for reference.
GET TO KNOW YOUR SOIL
Gardening success starts with the soil. Healthy soil contains roughly 25% air, 25% water, 45% minerals and 5% organic matter. Healthy soil is alive: One teaspoon of compost rich soil can host 600 million to 1 billon healthy bacteria! A soil test will indicate your garden’s pH (if it’s acidic or alkaline soil) and what nutrients are present; new and existing gardens should be tested. Home test kits are available from your local garden center. Make sure to read all the instructions and information included in the kits. Home test kits results will offer recommendations for adjusting soil pH and fertilizers for maximum plant performance. Most vegetables enjoy a pH of 6.2 – 6.8, herbs 7.0. Acidic soils (low in pH), can be corrected by the addition of lime. Alkaline soils (high in pH) require horticultural sulfur.
A healthy garden must have the proper balance of nutrients. Nitrogen promotes leafy top growth. Phosphorous promotes root growth and flower and fruit production. Potassium (Potash) improves general durability, and promotes disease resistance and cold hardiness.
Soil tests let you know if there is too little or too much of a nutrient. Proper fertilizers and quantities can then be determined and applied correctly. Soil testing eliminates the guesswork and will save you money on unneeded amendments!
AMENDING YOUR SOIL NATURALLY
Your goal is good soil texture, drainage and fertility.
Compost is the best way to improve any garden’s soil; it’s nature’s best soil amendment. Rich in soil nutrients, compost improves soil structure, aeration and enhances positive soil bacteria. Home composting is a great way to recycle kitchen scraps and unneeded garden materials as well as providing a source of free organic material.
Evenly spread a 2 inch layer of compost across your garden and work it in as deeply as possible; it’s a good practice to do this yearly. Soil amendments are best added in early spring a month before planting or in the fall after garden clean-up. Materials to correct soil pH (Lime for acid soil, sulfur for alkaline soil) are best added in the fall.
Manures are a good source of nutrients and organic matter. Fully composted manure releases nitrogen slowly into the soil and is fine soil builder. A word of caution: fresh manures can burn plant roots and can contain unwanted weed seeds.
Soil amendment coverage formula: Length x Width x Depth. Example: Your garden is 10 ft. long by 5 ft. wide. You want a compost depth of 2 inches. 10 x 5 x 2/12 (.167) = 8.35 cu.ft. To find cubic yards, divide by 27 (3 cu.ft. x 3 cu.ft. x 3 cu.ft.)
8.5 ÷.27 = .31 cu. yds.
Note: Do not work in your garden if the soil is wet! You’ll cause soil compaction, closing air pores necessary for healthy soil micro-organisms. If you’re using a rototiller, easy does it. Do not over pulverize the soil; it might look nice, but you’ll damage soil texture and collapse air pores necessary for the health beneficial soil organisms.
FERTILIZERS
Your soil test will give you a good handle on what nutrients are needed.
Consider the type of fertilizer you’re going to use. Organic fertilizers feed slowly, supplying all your plants needs as well as improving the soil. These fertilizers work best when the soil temperatures rise above 50˚. Organic fertilizers are less likely to burn plants if too much is used, and they contribute to soil structure. Chemical fertilizers work fast and are less expensive. However, overuse of chemical fertilizers can cause your soil to gradually loose organic content and micro activity.
Read, understand and follow the instructions on the fertilizer you select. Follow the application rates and all precautions carefully. Any questions, contact the place of purchase or the manufacturer.
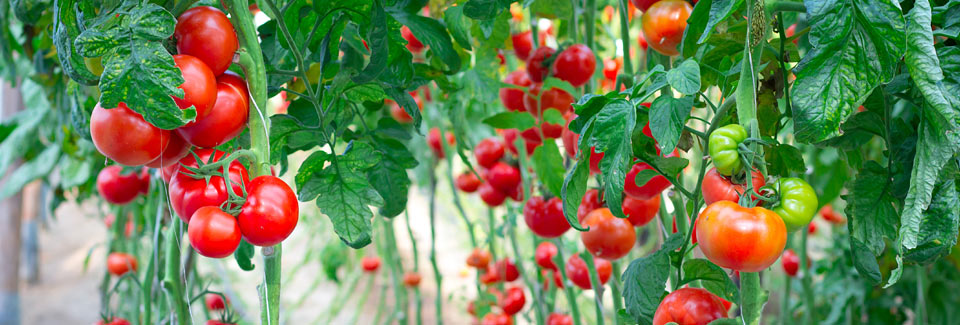
Fertilizer selection should be based on the plant’s needs. Example: Tomatoes should receive less Nitrogen, which promotes large, leafy plants but doesn’t help fruiting or disease resistance. Phosphorous will help develop strong roots and better fruiting. Potassium helps plants use water, resist drought, and grow larger vegetables. Tomato fertilizer should contain a good percentage of calcium to help prevent blossom end rot. Tomato fertilizer works well with peppers and eggplant; they’re all in the same family.
Good organic tomato fertilizers are balanced and contain trace elements, beneficial microbes and mycorrhizae. The microbes convert the nutrients at a steady rate to a form plants can use. Roots are able to get extra nutrition from the soil. These types of fertilizer should be worked into the soil near the plant’s root zone at planting time. Additional fertilizer should be applied during the growing season to meet crop’s seasonal needs.
Water soluble fertilizers work well and are convenient. Foliar feeding with a water soluble fertilizer is a great way to get nutrients and minerals directly into the plant through the leaves. Foliar fertilizing may be necessary in cold soil conditions. Thousands of microscopic pores are located mainly on the underside of the leaf. Spray the entire plant especially the undersides of the leaves with a liquid fertilizer solution. The finer the spray you use, the better. Foliar feeding works best early in the morning of a cool, overcast day. Make sure the plants are well watered the day before a foliar spray. Do not spray at temperatures of 80˚ or warmer-this may burn foliage. Properly timed applications will help a plant through its seasonal needs. Foliar feeding is economical and very effective-you’ll see quick results!
Your go to source for your gardening supplies and information should be the local garden center where you purchased Chef Jeff Vegetables and Herbs. Personal service, quality products and proper advice are what these fine, independent garden centers are all about!
WATERING
Your garden needs a minimum of 1- 3 inches of water per week.
Chlorine has a negative effect on plants and positive bacteria in the soil. Use de-chlorinated water whenever possible. Fill up a watering can and a 5 gallon bucket and let it sit for a couple of days. The chlorine will dissipate and the water temperatures will match the outside air (no cold shock to the plant).
Consider a rain barrel:
- Conserve on water and watering bills!
- Rain water has a neutral pH., and is free of minerals and chemical treatments which can negatively affect plants.
- Water the area around the plant’s base and not the foliage.
- Water in the morning when possible.
- Evening watering encourages plant diseases! Don’t put your plants to sleep with wet feet!
- Timers are a good option for working gardeners.
Tip: Drip watering is a great way to conserve water and puts it where it is easily used near the root zone. A multitude of drip irrigation systems are offered commercially. You might opt to create your own from recycled plastic gallon milk bottles. Save plastic gallon containers with caps. Clean the containers and place a small hole in the bottom of each container. Fill the containers with water. Use the cap to “adjust” the rate at which the water drips out of the bottom of the containers. Adjust for a “slow drip.” Place one container about 6 inches away from the base of each tomato plant. Check your irrigation system after a few days. When you fill a container the second time, move the container to the other side of the plant and a little farther from its base. The plant will build a healthy root system while “working” for its water. This “system” also works well for fertilizing your plants. Mix a water soluble fertilizer per instructions for a one gallon container and repeat the above steps.